
Success Guide
This checklist was created to guide new users to master the most important parts of ads2grid.
Follow this guide in sequence and you will be an Ads2grid master in no time!
Share this guide to your team to ensure everyone is on the same direction.
ESSENTIALS
Ads2grid consists of 2 main components:
- Content Creation (Apps, Media, Integration)
- Content Management (Playlists, Devices, Customization)
You design content like Apps, Media, and connect visuals that you will display. Then, you control this content by organizing it into Playlists and applying playlists to Devices.
In this part, we will go through the fundamental features of each element.
Digital Signage Content Creation Fundamentals
Step 1:
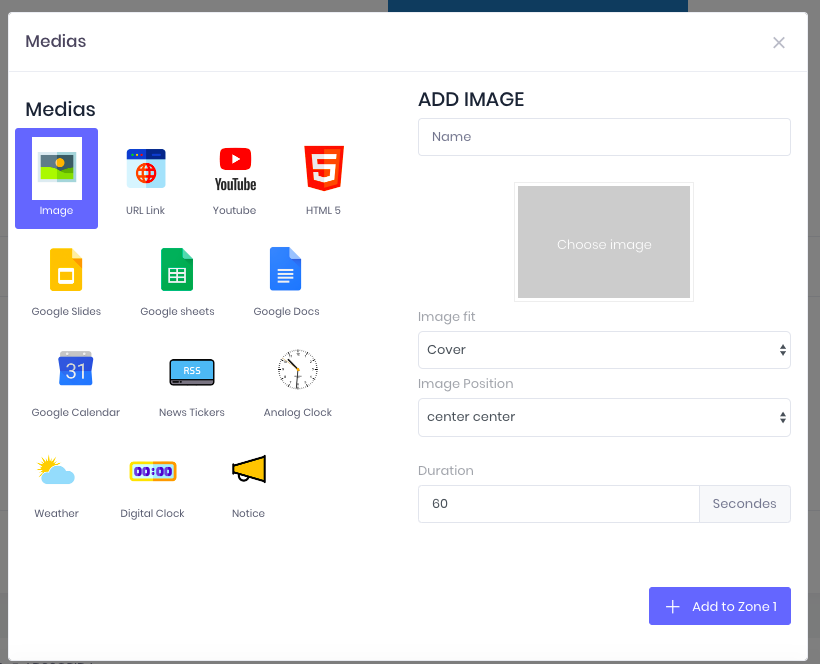
Upload a MEDIA File
Your media menu is where you can upload your custom images that you can use to design content or add directly to a playlist.
Upload your first media to your media folder.
Reminder:
Images and Videos should be optimized for your screens before uploading. Too large files may impact performance on certain devices.
Go to your Dashboard, Click Media. You can also access your Media files on your side Menu.
Library menu is where you can use available images for free. With Image search, you can easily search all your image files.
Tip: We suggest to name your image files to properly organize and easier search.
Folder: You can better organize your images using folders, as per project or content.
Upload images by drag and drop or access your device media folder.
For more information, check out our documentation on Media
Step 2.
Create your first PLAYLIST
Playlists are where you add, organize, and schedule the content that you built. You can manage your programs. Schedule your content and broadcast it to your devices.
On your Dashboard > You can go to Playlist or at the side Menu.
Click ADD NEW Button. Name your playlist. Choose the Layout template you want.
Now, it’s time to choose content of your Playlist.
Choose the Zone you need to build your content. Click Add Content.
You can also choose to customize the style.

Choose your preferred Media.
For more information, check out our documentation on Playlists.
Step 3: Pairing Device
Even without your device ready yet, you can simulate the preview on your browser. Please note that the browser player is meant for testing purposes and is not recommended for long-term use.
- First, check our Devices documentation so you understand how the Devices page works.
- Open a browser window and go to player.ads2grid.com
- From the Ads2grid Devices page, pair the browser player to your account using the six-digit pairing code from the player. The device will appear in your devices list.
- From the details tab on the right, assign the playlist you created to this new device.
Hurray! You should now see your playlist playing in your browser window!
For more information, check out our documentation on Device